Motivation
The command line provides a fast way of interacting with the computer when compared to the mouse and GUIs. If you have a high typing speed and good command line skills, you drastically reduce the time between getting an idea and trying it out. However, this will only work if the terminal setup you are using is robust. The default command line experience on Windows is not robust. But the good news is that it can be made better.
Definitions
Some definitions are necessary to make things clear. It should be noted that the definitions below are given in “layman” terms. The goal of this article is not to go into great detail regarding these concepts but to use them. More information can be found, for example here (archive link).
- A terminal was a device on old computers that allowed you to interface with the computer system. It had a keyboard to type in and a screen which showed your inputs and outputs. This was the case before the advent of modern operating systems.
- A terminal emulator became necessary with the creation of modern operating systems that had multiple resizable windows and all other features that we nowadays take for granted. It became necessary to emulate the behavior and function of the terminals, hence the name. The window, which opens when you open cmd or powershell on Windows is a terminal emulator. The brand-new Microsoft product “Windows Terminal” is also a terminal emulator. There are also others.
- A shell is a program that interprets the input you provide to the terminal emulator and provides an output. Examples of the shell are cmd, powershell on Windows and bash, zsh on Linux.
- The command line or the command line interface (CLI) refers to the interface where you type in your command (i.e., into the terminal emulator) and get the output (from the shell which interprets your input).
If you were to just write in Windows search “powershell”, you would be greeted with a window similar to this one below (on some versions of Windows it is blue by default):
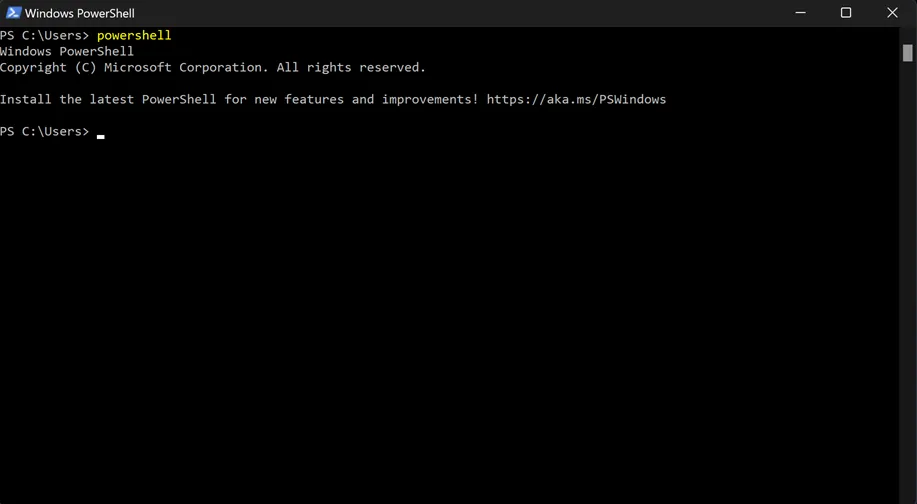
The window itself is the terminal emulator. Powershell is your shell. Everything together is the CLI.
The main shells on Windows that people use are cmd and powershell. The modern one is the powershell, while cmd is the old one. The latter is faster and more lightweight, but we will use powershell for this tutorial, since it has more capabilities.
Powershell Basics
Launching powershell by default puts you in your user folder. This is the C:\Users\YourUsername that you see at the beginning of the line. This is known as the home folder. You can navigate through your system using the command “cd”, which stands for “change directory”. As an example, just type in:
cd C:\
and press Enter. This will put you in your C: drive. Most used shells have some sort of autocomplete by default. Autocomplete is able to complete commands, paths and sometimes options. To see how it works, type:
cd C:\U
and press Tab. Unless you have another folder in C:\ starting with U, this should autocomplete to C:\Users. If you have other folders, continuously pressing Tab will cycle through all the possible autocomplete options.
What you need to know if you use the powershell is the following: powershell syntax is very verbose, i.e. the real command names are usually long, but they are often mapped to short aliases. For example, execute the following command:
Get-Alias cd
This shows you that cd is actually an alias for Set-Location, i.e. if you were to write Set-Location instead of cd, you would get the same result.
Most aliases come from command names in cmd or Linux bash. It is useful to know them, since then you are able to navigate other shells as well. You can also set your own custom aliases. The general advice here is the following: if a short alias is missing, check if that command exists in Linux. If it does, set the alias to the Linux command in powershell.
As a next step try executing:
dir ~
You should see a list of all the files and folders in C:\Users\YourUsername directory. The command dir is an alias for listing all items in the directory, whereas “~” expands to C:\Users\YourUsername. The latter works on Linux too.
If you would like to quickly switch to a graphical view of the current directory you are in, just execute:
start .
This should open a Windows Explorer window in the current directory. The command start executes whatever comes after it. The “.” expands to the current directory you are in. This command means “execute current directory”, which is done by the Windows Explorer in Windows. If you were to type in not just a directory, but, say, a path to a PDF file, then the file would open in your default PDF application.
We have talked about what a terminal emulator and shells are, as well as checked a few basic commands in powershell. It is almost time to talk about changing the settings, but first we need to talk about package managers.
Package Managers
If you are used to Windows, you probably install the software by either:
- Searching for the program you need online, downloading the installer, clicking on it and going through the installation process.
- Selecting the program from a pre-defined list in some sort of a software center. This is often the case at medium-large size companies, which have some sort of a central repository of software, which you are allowed to install from. Installing software on Linux is a completely different experience. Most of the time you can install software just by commands like:
apt install yourdesiredprogram
This searches the program in pre-defined repositories. If it is found, the software is downloaded and installed. The command/software that does this process is called a package manager. In the command above, apt - Advanced Package Tool is the package manager, which is the standard on Debian-based Linux systems.
While the package manager approach may not seem preferrable if you are not used to the command line, it allows installation of software simply by typing in commands in the CLI or copy pasting them from somewhere.
There are many different package managers. Even program languages have package managers. For example, pip is sort-of a package manager for Python (strictly speaking it is a package installer). It should be noted that making a good package manager is hard (archive link). However, providing more details regarding package managers is beyond the scope of this article.
Windows Package Managers
Disclaimer: if you are planning to do the installation on a work laptop/PC, it is necessary to check if the company’s IT policies allow it.
There also exist a few package managers for Windows. The official package manager from Microsoft is WinGet. However, at the moment WinGet installs the software exactly the same way as if you were to just downloaded the installer and clicked through the installation wizard. We actually don’t want that. We want a package manager that:
- Doesn’t require admin rights. This makes things much simpler, since the programs are installed only for your account and are portable. This can be useful at work, if your IT policies do not allow for admin access, but find installations in your user directory acceptable.
- Adds most of the programs to the Windows PATH environment variable by default. This is useful, since the goal of this tutorial is to enable you working more in the command line. If you are unfamiliar with what the PATH variable is, you can read more about it here (archive link).
Luckily scoop package manager does exactly that. This tutorial will contain the abridged version of the installation and operation of scoop. Detailed instructions and further information can be found here.
Installing Scoop & Packages
In order to install scoop open powershell and run:
Set-ExecutionPolicy -ExecutionPolicy RemoteSigned -Scope CurrentUser
Invoke-RestMethod -Uri https://get.scoop.sh | Invoke-Expression
The first line changes the execution policy of powershell (for the current user, hence the -Scope) to allow running scripts that are remotely signed by a trusted publisher.
The second line downloads a script from get.scoop.sh and executes it with Invoke-Expression (| is known as the piping operator - it takes the output of the command to the left of it and uses it for the command to the right).
This creates a scoop folder in your user’s home directory. To check if it worked, run the following in the powershell:
dir ~/scoop
This should list the contents of the newly created scoop folder. If something didn’t work or the installation had errors, it is likely that your firewall settings blocked the download.
As a next step, we should install some packages. It may be that some of the software below is already installed on your system. The general advice would be: uninstall it and install through scoop. It makes things much easier. Run the following commands:
scoop install git
scoop bucket add extras
scoop install wezterm
scoop install pwsh
scoop install fd
scoop install fzf
scoop install tlrc
- First command installs
git, which is necessary for the functioning of scoop. - Second command adds the bucket extras. Buckets are collections of programs. “Extra” bucket of scoop contains the gui applications.
weztermis a cross-platform terminal emulator. There are others but we will use it for this tutorial.pwshis the modern cross-platform version of the powershell. It is not strictly needed, but it has the new features and is actively updated.fdis a quick search function that allows you to find files using the command line.fzfis a fuzzy finder, which, again, is useful when searching for files or through file contents.tlrcis a package that gives you access to thetldrcommand in your command line. By executing, saytldr scoop, you will get examples of how the scoop command can be used. This serves as a “tldr” version of manuals and manpages of various commands, giving you immediate examples of how to use the command. There are many other useful packages, but for the purpose of what we are doing, this should suffice.
Customizing WezTerm
We can start by just launching WezTerm. If you just go to the start menu and type WezTerm it should come up. After opening it you will most likely see a window highly similar to the following one:

mkdir $HOME\.config\wezterm
This will create a wezterm directory in the .config directory of your user folder ($HOME in powershell resolves to C:\Users\YourUsername). If .config directory is missing, it is created too.
As a sidenote, it is beneficial to keep all the configuration files of different programs within the same directory, say $HOME\.config. However, different programs on Windows tend to save their config files in different locations. A good solution in this case would be to use symbolic links or shortcuts, which point to the $HOME\.config folder (somehow similar to what GNU Stow does on Linux).
After creating the directory, we can create the configuration file for WezTerm. It uses the Lua programming language and the commands are rather self-explanatory. In-depth information on all options can be found in WezTerm’s Full Config and Lua Reference, or you can just use any LLM like ChatGPT to quickly come up with some simple configuration.
We can create a configuration file in the command line simply by using Set-Content function of powershell (similar to how you would use something like echo command with >> operator on Linux):
@'
-- Pull in the WezTerm API
local wezterm = require("wezterm")
local mux = wezterm.mux
local act = wezterm.action
local config = {}

-- Use config builder object if possible
if wezterm.config_builder then config = wezterm.config_builder() end
config.audible_bell = "Disabled" --Disables the sound

config.default_prog = {"pwsh.exe", "-NoLogo"}
config.color_scheme = "Tokyo Night"
-- config.font = wezterm.font_with_fallback({
    {family = "Hack NF", scale = 1.0}
})
config.use_fancy_tab_bar = false
config.hide_tab_bar_if_only_one_tab = true
config.font_size = 16
config.window_decorations = "RESIZE"
config.disable_default_key_bindings = true
config.leader = { key = ",", mods = "CTRL", timeout_milliseconds = 1000 }

--starts WezTerm maximized.
wezterm.on("gui-startup", function(cmd)
    local tab, pane, window = mux.spawn_window(cmd or {})
    window:gui_window():maximize()
end)
config.disable_default_key_bindings = true
--Sets the leader key ",", which is used for various keyboard shortcuts.
config.leader = { key = ",", mods = "CTRL", timeout_milliseconds = 1000 }
config.keys = {
    {key = 'W', mods = 'CTRL', action = wezterm.action.CloseCurrentPane { confirm = true },},
    { key = "s", mods = "LEADER", action = act.SplitVertical { domain = "CurrentPaneDomain" } },
    { key = "v", mods = "LEADER", action = act.SplitPane {direction = "Right", size ={Percent=30} } },
    { key = "h", mods = "LEADER", action = act.ActivatePaneDirection("Left") },
    { key = "j", mods = "LEADER", action = act.ActivatePaneDirection("Down") },
    { key = "k", mods = "LEADER", action = act.ActivatePaneDirection("Up") },
    { key = "l", mods = "LEADER", action = act.ActivatePaneDirection("Right") },
    { key = "Enter", mods = "LEADER", action = act.ToggleFullScreen},
    { key = "Space", mods = "CTRL|SHIFT", action = act.ActivateCopyMode},
    -- We can make separate keybindings for resizing panes
    -- But Wezterm offers custom "mode" in the name of "KeyTable"
    { key = "r", mods = "LEADER", action = act.ActivateKeyTable { name = "resize_pane", one_shot = false } },
    -- Resizing Panes
    { key = "H", mods = "LEADER", action = act.AdjustPaneSize{"Left",5} },
    { key = "J", mods = "LEADER", action = act.AdjustPaneSize{"Down",5} },
    { key = "K", mods = "LEADER", action = act.AdjustPaneSize{"Up",5} },
    { key = "L", mods = "LEADER", action = act.AdjustPaneSize{"Right",5}},
    -- Cycling
    { key = ";", mods = "CTRL", action = act.ActivatePaneDirection("Next") },
    -- Paste
    {key = "V", mods = "SHIFT|CTRL", action = act.PasteFrom "Clipboard"},
}

return config
'@ | Set-Content -Path "$HOME\.config\wezterm\wezterm.lua" -NoNewline -Encoding utf8
Of course you are also welcome to just edit/write the file using the editor of your choice. Most options seem self-explanatory - it sets the new powershell as the default shell, sets a color theme, and adds some common shortcuts. There is also a commented-out line to set the font to Hack NF Nerd Font. Fonts can be installed with scoop or manually.
Customizing Powershell
After customizing the terminal emulator, it is time to also customize our shell. First, we will make the powershell profile file and install a fuzzy finder for powershell with the following commands:
New-Item -Path $PROFILE -ItemType File -Force
Install-Module PSFzf
Next, we can put some basic configuration and customize how the powershell looks.
@'
#Prompt Customization
function prompt {
$Date = Get-Date -Format 'dddd HH:mm:ss'
$LastCom = Get-History -Count 1
if ($LastCom) {$RunTime = ($LastCom.EndExecutionTime - $LastCom.StartExecutionTime).TotalSeconds}
$ElapsedTime = [math]::Round(($RunTime), 3)
$ElapsedTime = -join (($ElapsedTime.ToString()), "s")
Write-Host $PWD -ForegroundColor Blue -NoNewline
Write-Host " [$date]" -ForegroundColor Yellow
Write-Host "[$elapsedTime] " -NoNewline -ForegroundColor Green
return "> "
}
Set-PSReadLineOption -EditMode Emacs `
-BellStyle None `
-PredictionSource History `
$PSStyle.FileInfo.Directory = "`e[38;2;255;191;0m"
Set-PSReadLineKeyHandler -Key Ctrl+Spacebar -Function AcceptSuggestion
# Fzf
Set-PsFzfOption -PSReadlineChordProvider 'Ctrl+g' -PSReadlineChordReverseHistory 'Ctrl+r'
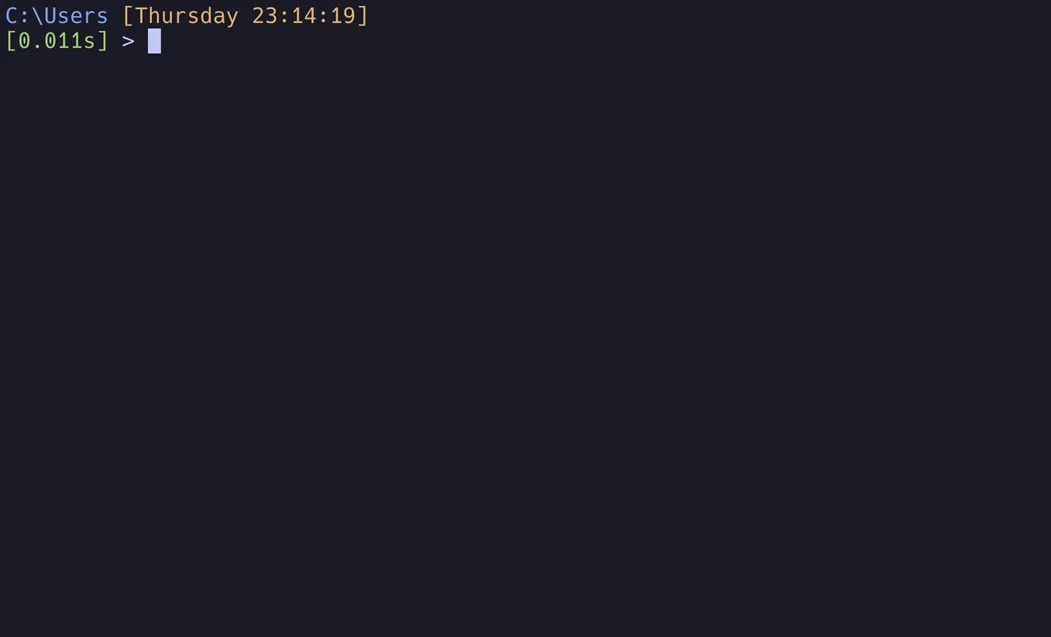
'@ | Set-Content -Path $PROFILE -NoNewline -Encoding utf8
Now when you start the WezTerm it should look like this:
Conclusion
This article walks through a basic configuration of a terminal emulator and powershell on Windows. There are many topics not covered this article, such as:
- Other terminal emulators. Popular choices on Windows include the Windows Terminal and Alacritty. Windows Terminal is the official terminal emulator from Microsoft. It is pretty fast, with many useful features. In contrast, Alacritty is minimalistic. I would personally recommend using either Windows Terminal or WezTerm on Windows.
- External packages for powershell customization. An example is the Oh My Posh theme engine. I personally don’t prefer these additional packages, since they slow down the shell significantly. The configuration given in this article does some basic coloring and styling without using any external packages, which is what I recommend.
- Additional settings. There exist a myriad of additional settings for both the terminal emulators and powershell. The configurations given here are minimal and can be expanded to fit your precise style. As already mentioned, such tools as ChatGPT and other LLMs provide a simple way of writing first drafts of configuration files.
- Keyboard shortcuts. My WezTerm config file features some keyboard shortcuts. Each person has their own approach to keyboard shortcuts. My approach is to standartize the shortcuts across most of the programs I use. Specifically, most of my shortcuts are inspired by Neovim and GNU Emacs.